LEATHER VASE w/ Charlie Davenport
LEATHER VASE PROJECT
Materials Shopping List Link
LEATHER
• 4-5oz Veg-Tanned Leather (Sides)
• 5-6oz Veg-Tanned Leather (Base)
TOOLS
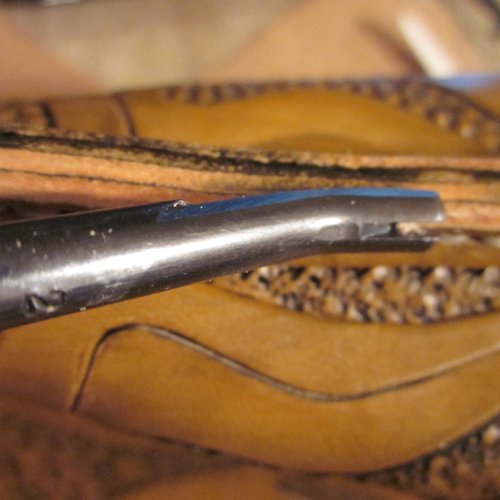
• 35010-02 Damascus Straight Trim Knife
• 35017-00 Small Round Knife
• 31811-00 Adjustable “V” Gouge
• 8117-01 Pointed Bone Creaser
• 3606-00 Ruler
• 8120-00 Glass Burnisher
• 8077-02 Keen Edge Beveler, Size 2
• 8121-00 Multi-Sized Wood Slicker
• 8039-06 Pro Modeling Tool, Stylus
• 8039-01 F/Small Round Spoon, PMT
• 88013-00 Hair Blade Tool
• 3465-00 Pro Cutting Board
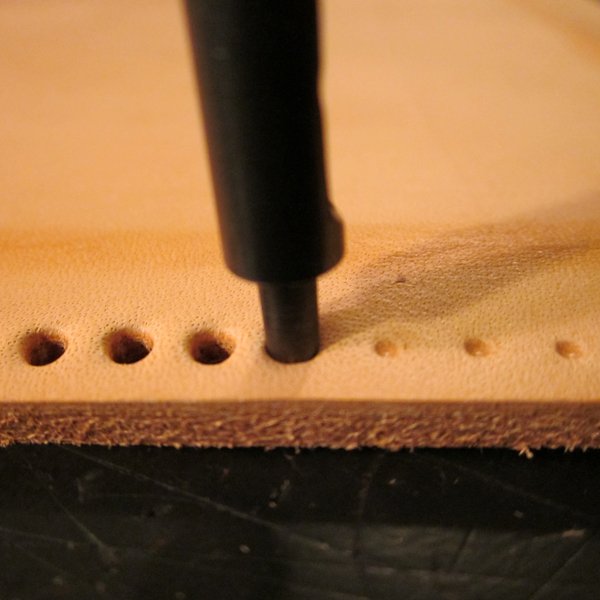
• 3777-33 Drive Punch, Size 00
• 88081-00 Pro Stitching Groover Set
• 31218-01 Stitching Awl w/ Blade
• 1192-00 Harness Needles
• 3132-00 Stitching Pony
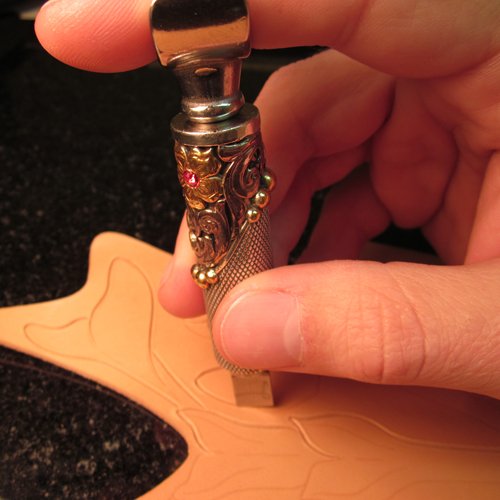
• 35048-00 Pro Swivel Knife
• Craftool® Stamps (B200, B197, F897,
S632, S864, F941)
OTHER SUPPLIES
• 11207-02 Waxed Linen Thread, Natural
• 2620-01 Gum Tragacanth
• 2225-01 Edge Kote, Black
• 3447-03 Flat Brush, 1-1/2in
• 2607-03 Eco-Flo™ Ant. Gel, M Brn
• 2611-01 Eco-Flo™ Satin Shene
• 3448-12 Synthetic Wool Pads
NOTES
• For a less advance project, omit the four external short pocket pieces.
• For additional instructions for some of the techniques discussed on the project (Basic Leather Carving, Hand Stitching, etc…) please watch our how-to videos: http://www.tandyleatherfactory.com/Leathercraft-Videos.aspx
PATTERN TEMPLATES
Use the patterns provided to make your own reusable templates from heavy cardstock, bag stiffener, or other template material for future use.
CUT LEATHER
Layout your leather grain side up on your work surface, then place templates onto the leather and trace around the template with a stylus. Another way is to layout the leather grain side down, and trace around the template with a pen or pencil. Carefully using a knife cut out your leather. Use a ruler for all straight lines for a cleaner cut.
The base piece requires some additional work to assist in folding the edge flaps. Use a ruler to mark the fold lines on the flesh side as shown on the template. Using a ruler and the Adjustable Gouge, gouge a channel from corner to corner about half the depth of the leather. I used the small round knife to widen the gouge to make the folding of the flap easier. Now is a good time to punch the stitching holes with a size #00 drive punch. Next, lightly dampen the gouged channels, and then start folding the edges with one hand and simultaneously run the bone folder down the channel. Repeat for other sides of base, and let dry.
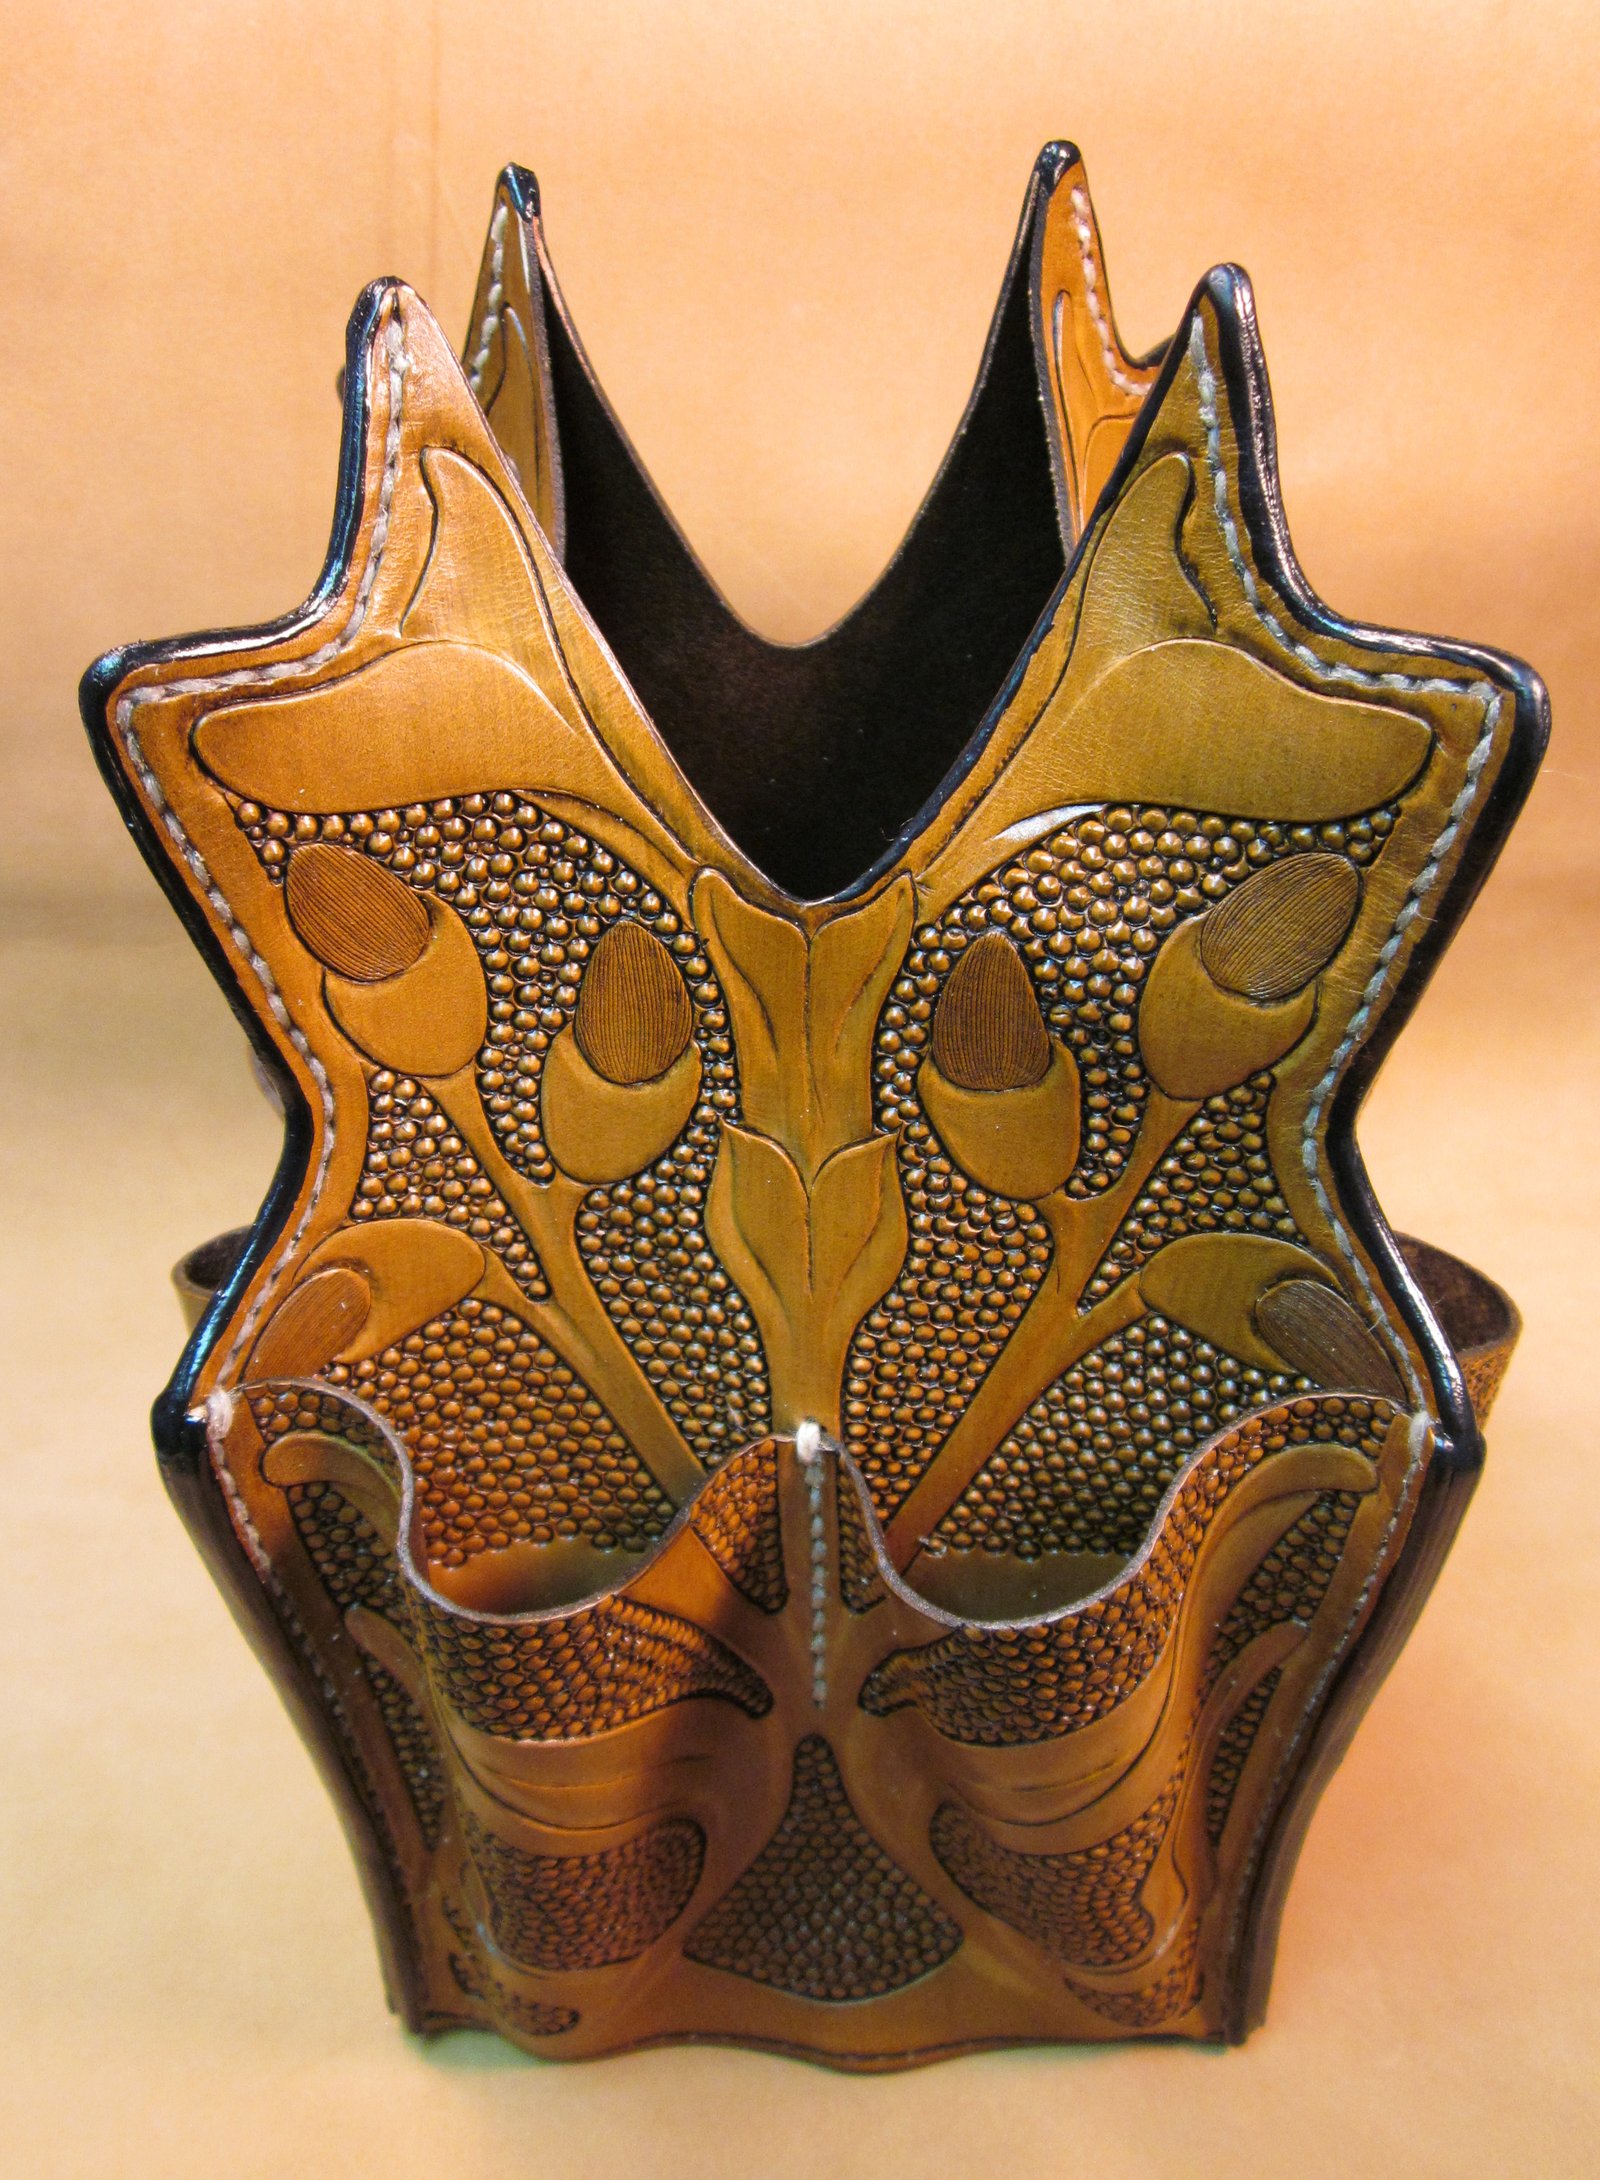
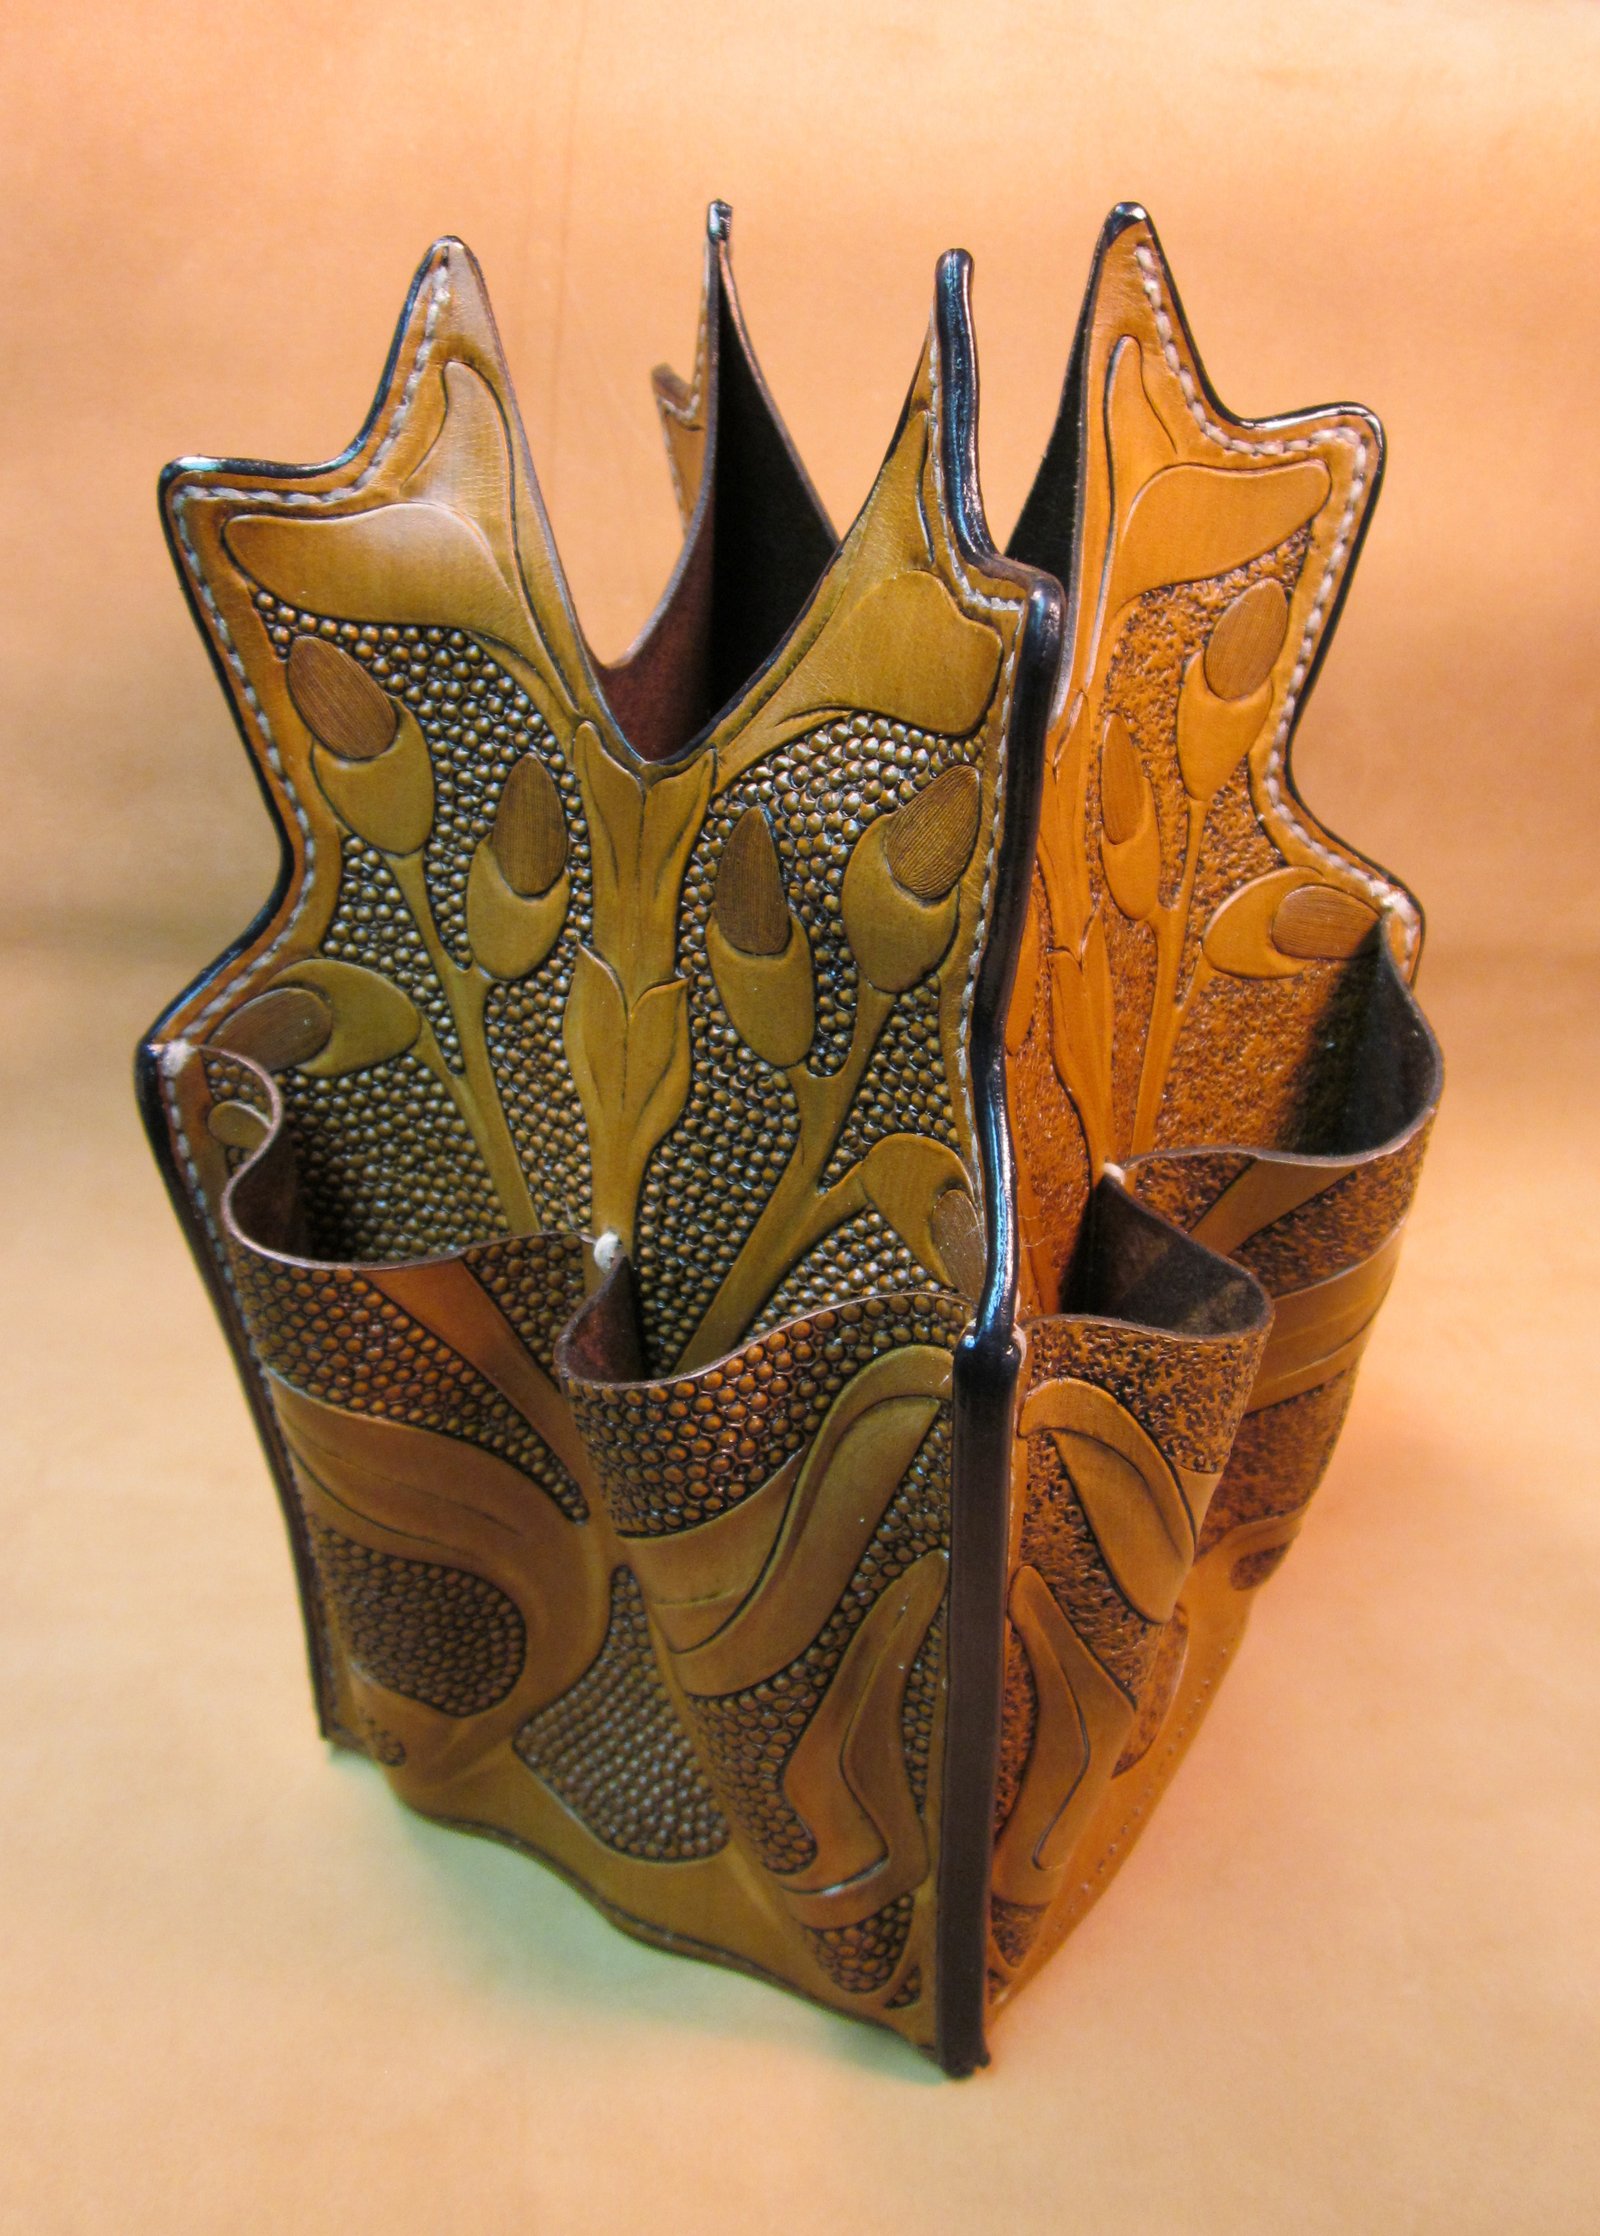
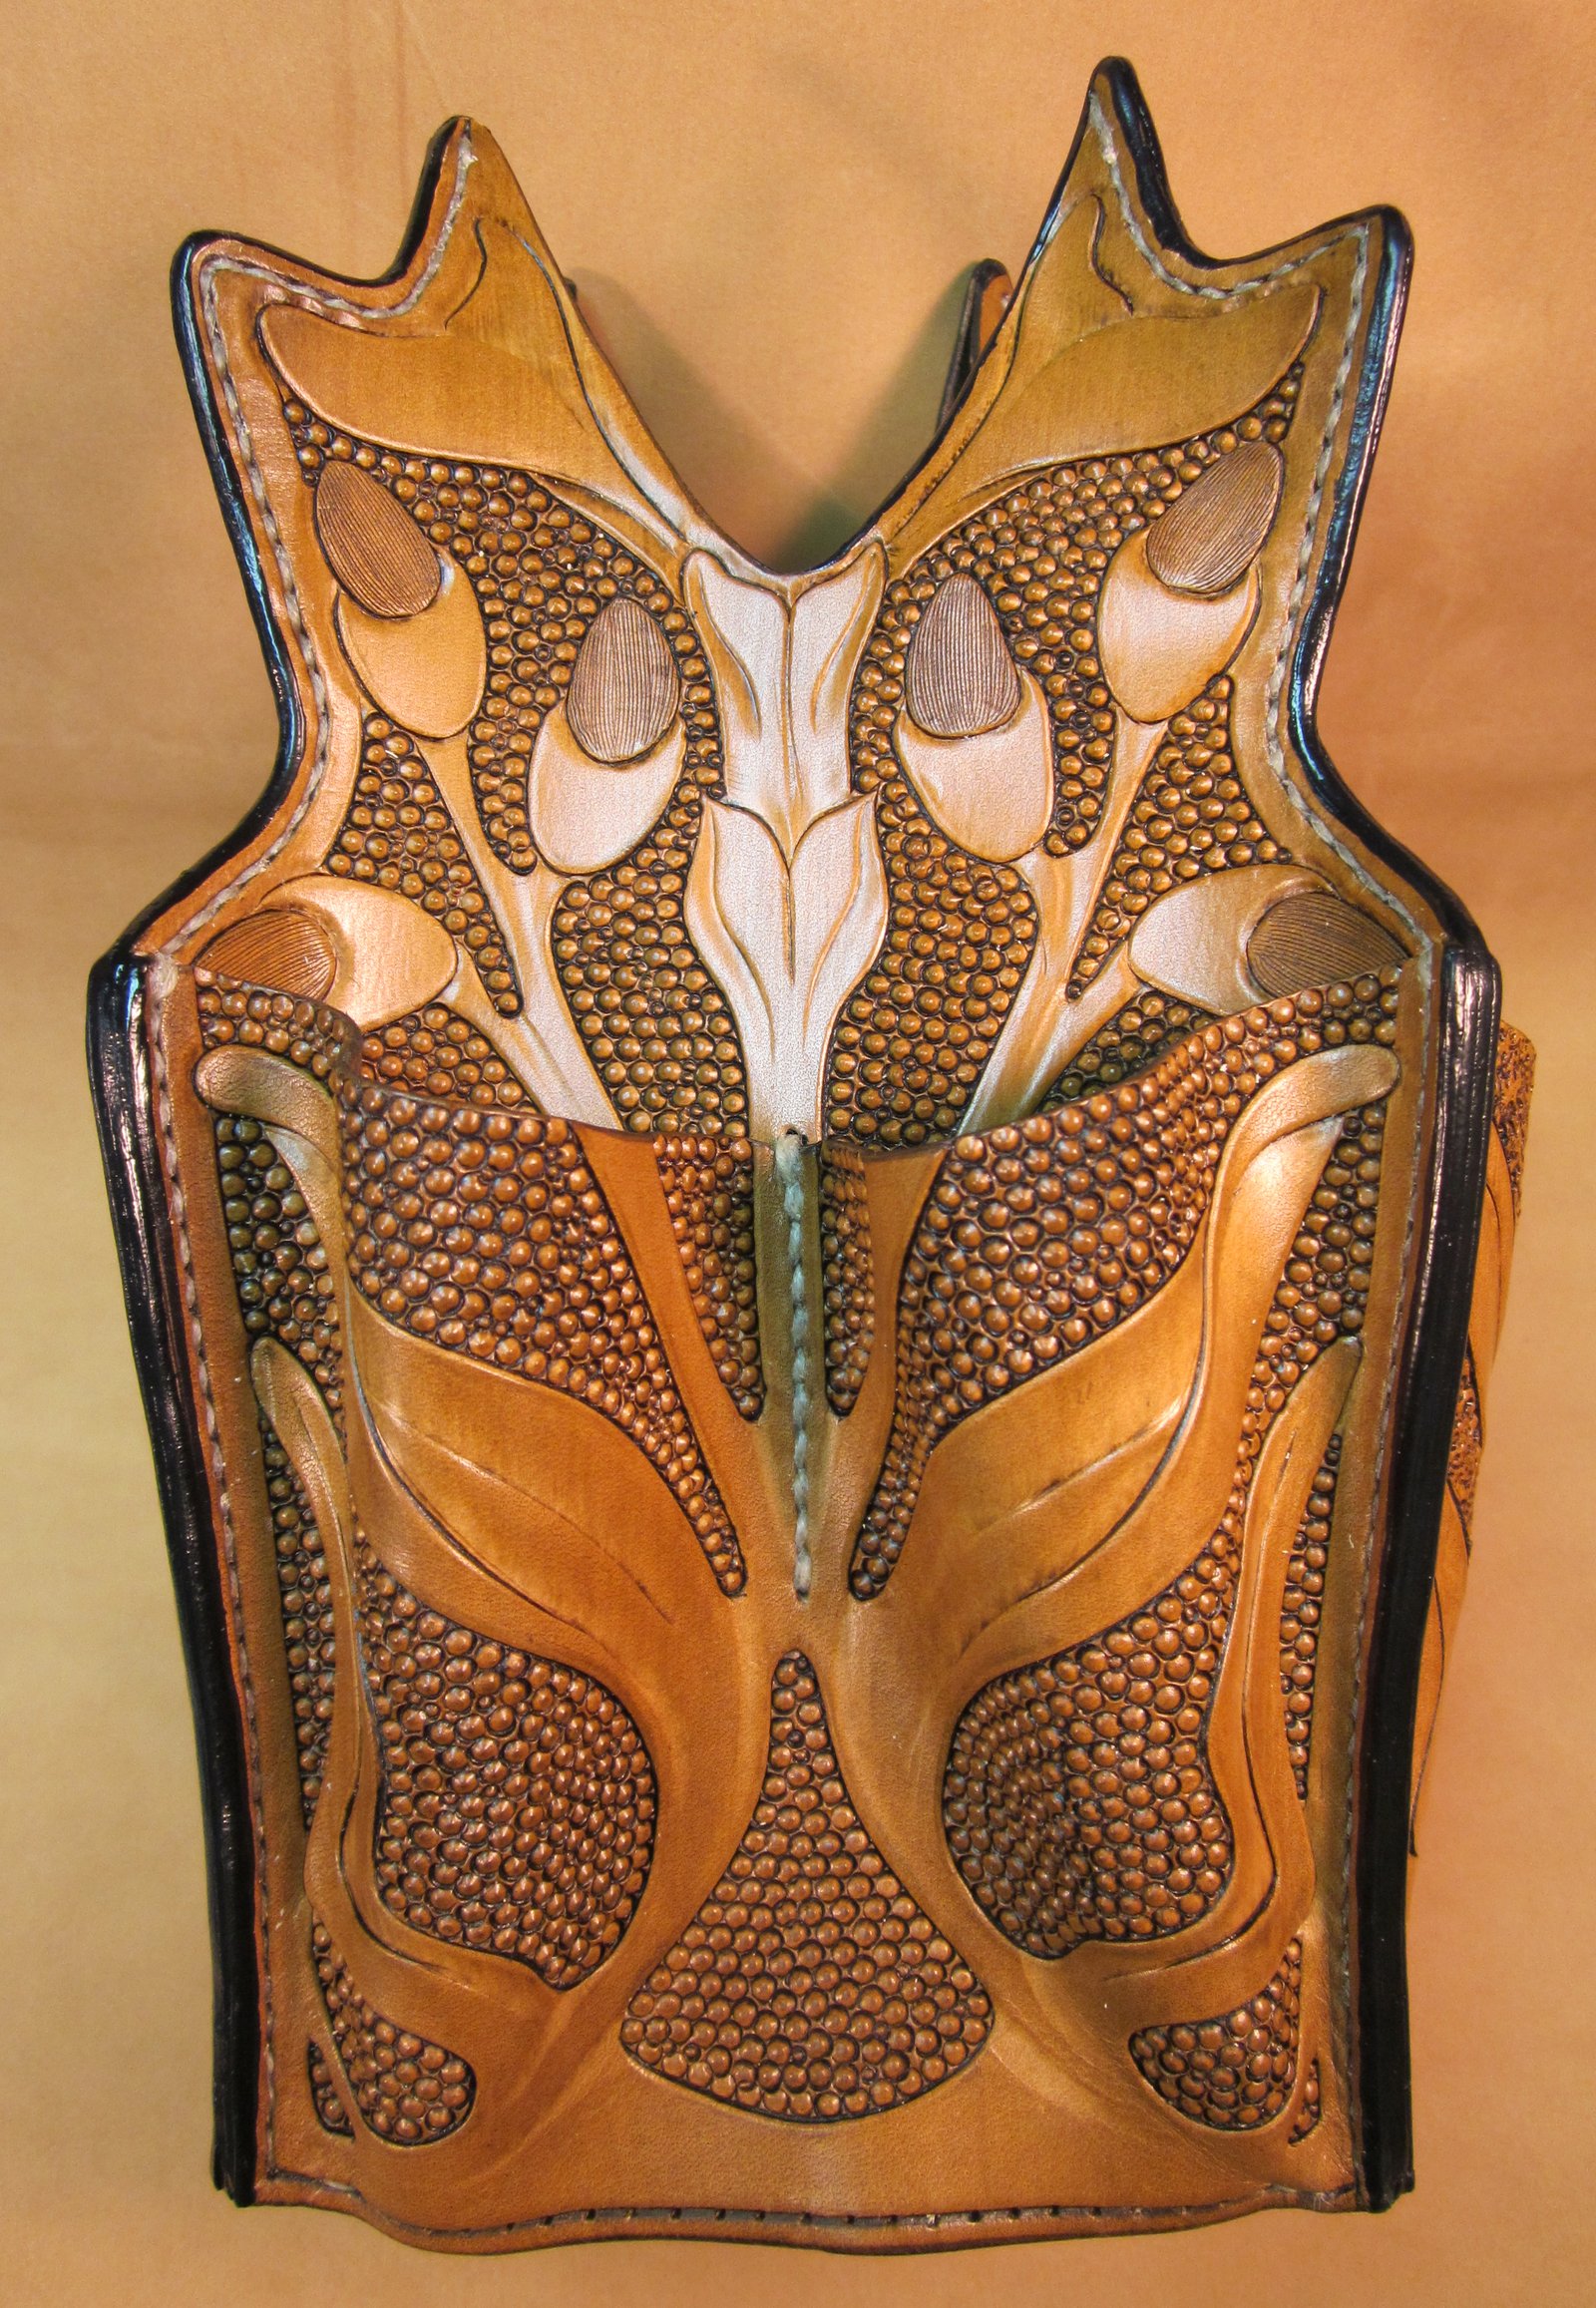
DESIGN WORK
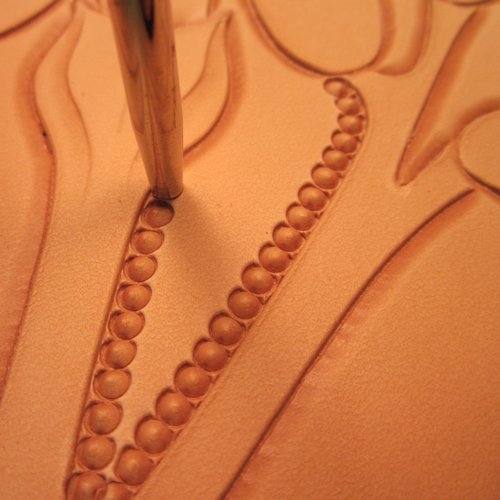
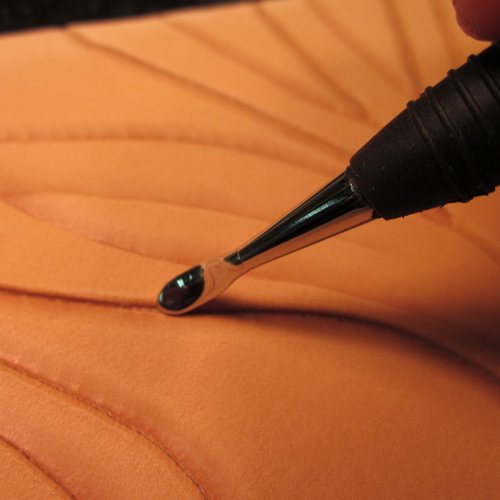
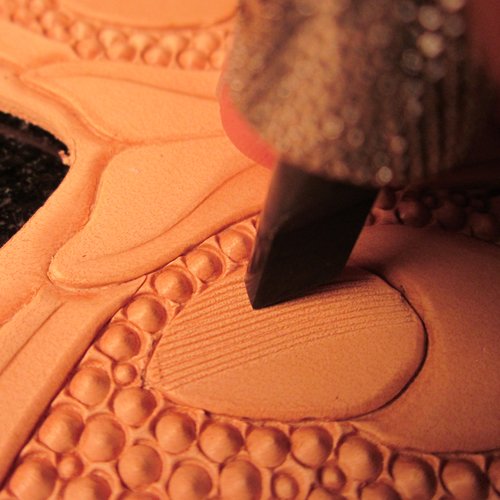
Prep your leather pieces for design work, by dampening the leather. Transfer a tooling design to the leather with a stylus. After transferring design, cut the design into the leather with a swivel knife (only cut the solid lines, do not cut the dotted lines). Bevel all cut and dotted lines with a beveler. The F941 fits nicely in the “V”s in the center. After beveling all the cut lines, I will use a modeling spoon to round all the cut edges, smooth out any rough beveling, and add any additional design work. Wait until the leather is almost dry prior to beginning the background design work. You can use any background or matting tool for this project, I chose to use a couple of seeders to fill the background areas. Lastly, I dragged the hair blade tool across the buds to add some addition texture.
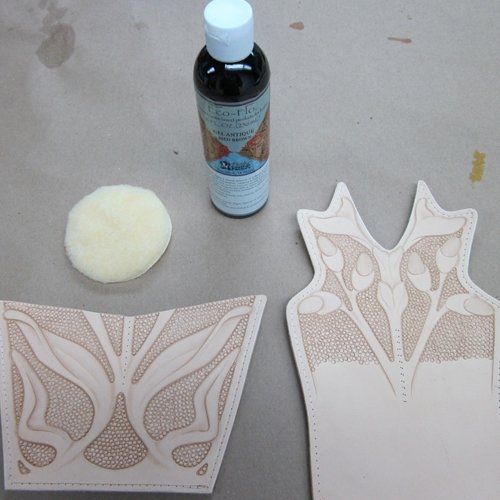
DYEING & FINISHING
To apply some color to this project I used the Eco-Flo™ Antique Stain Medium Brown. I applied the stain with a synthetic wool pad, working the stain into all cuts and impressions. Wipe off excess stain with paper towel or rag before stain dries, and buff. Wait until stain is completely dry, and then apply a finish. I applied a thin coat of Eco-Flo™ Satin Shene with a 1-1/2” flat brush, let dry.
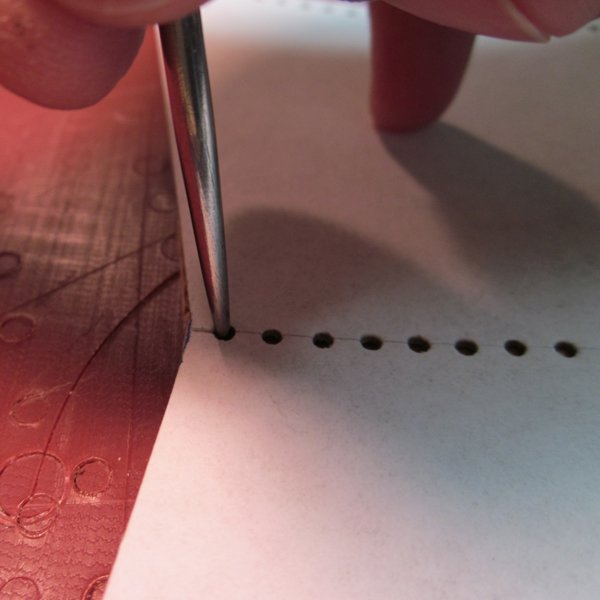
HAND STITCHING
There are a few different options you have at this point. The first and easiest way is to use the template and mark the placement of the stitching holes, and then punch the holes using a size #00 drive punch. The second option uses an awl and groover for a more professionally finished look.
ASSEMBLY
The first step to assembling the vase is to attach the exterior pockets to the larger side panels. Next step is to stitch two of the side panels together, then attach remaining panels. Once all four side panels are attached to, each other attach the base piece. Note: to add some additional strength to the project, I double stitched at the top of the vase and the junction where all four side pieces join.
EDGE FINISHING
After you have assembled the vase, it is time to clean up and finish the edges. The first step is to even up the edges; I use a straight edge knife to trim off the excess leather. Next, I used a size 2 Keen Edge Beveler to round the edges of the vase. To get a smooth polished edge I applied Gum Tragacanth to the edges and “slicked” with the Multi-Sized Wood Slicker until dry and polished. The final step is to apply an edge finish. I applied Fiebing’s black Edge Kote with a small wool dauber.
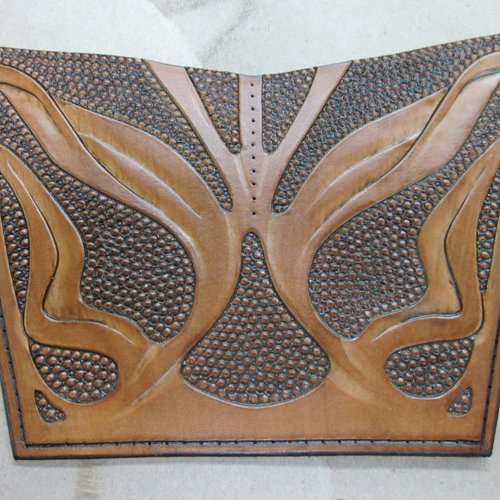
COMPLETED
This premium has been published by Tandy Leather Factory, 1900 South East Loop 820, Ft. Worth, TX 76140. Copyright © 2011 by Tandy Leather Factory, all rights reserved. The contents of this publication may not be reproduced either in whole or in part without the consent of the copyright owner. Please respect the copyright by not forwarding or distributing this document.